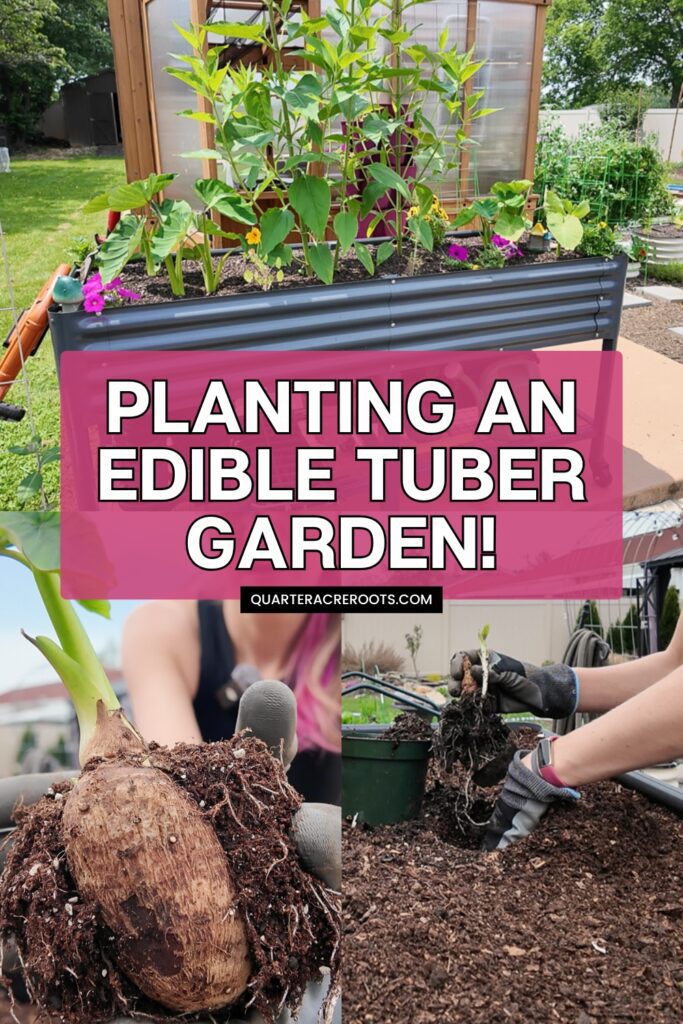
Planting an Edible Tuber Garden
I have been wanting to try out growing some new edibles—some more non-traditional things to complement my tomatoes and peppers and all of the other “normal” stuff I grow. So when my cousin gave me a few sunchoke tubers this year, that was the start of my edible tuber bed!
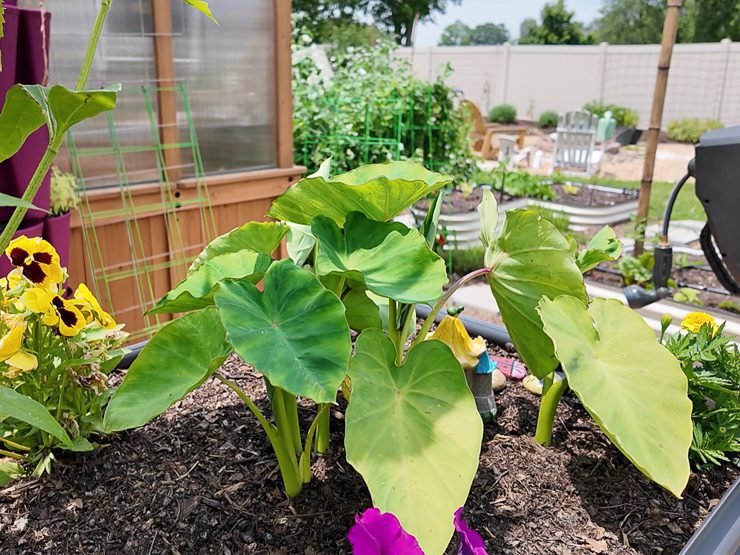
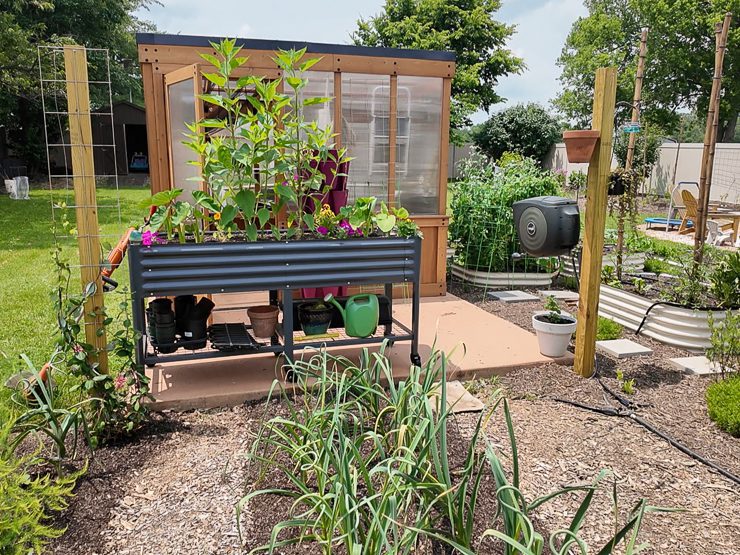
Sunchokes are prolific and spread like crazy, so until I decide where I want to plant them, I’m putting them in an elevated garden bed. Alongside the sunchokes, I’ve got taro root and ginger.
What’s in the bed
Here’s the lowdown on everything in this bed and why I’m growing it! And my recommendations for where to start if you want to grow any of these things.
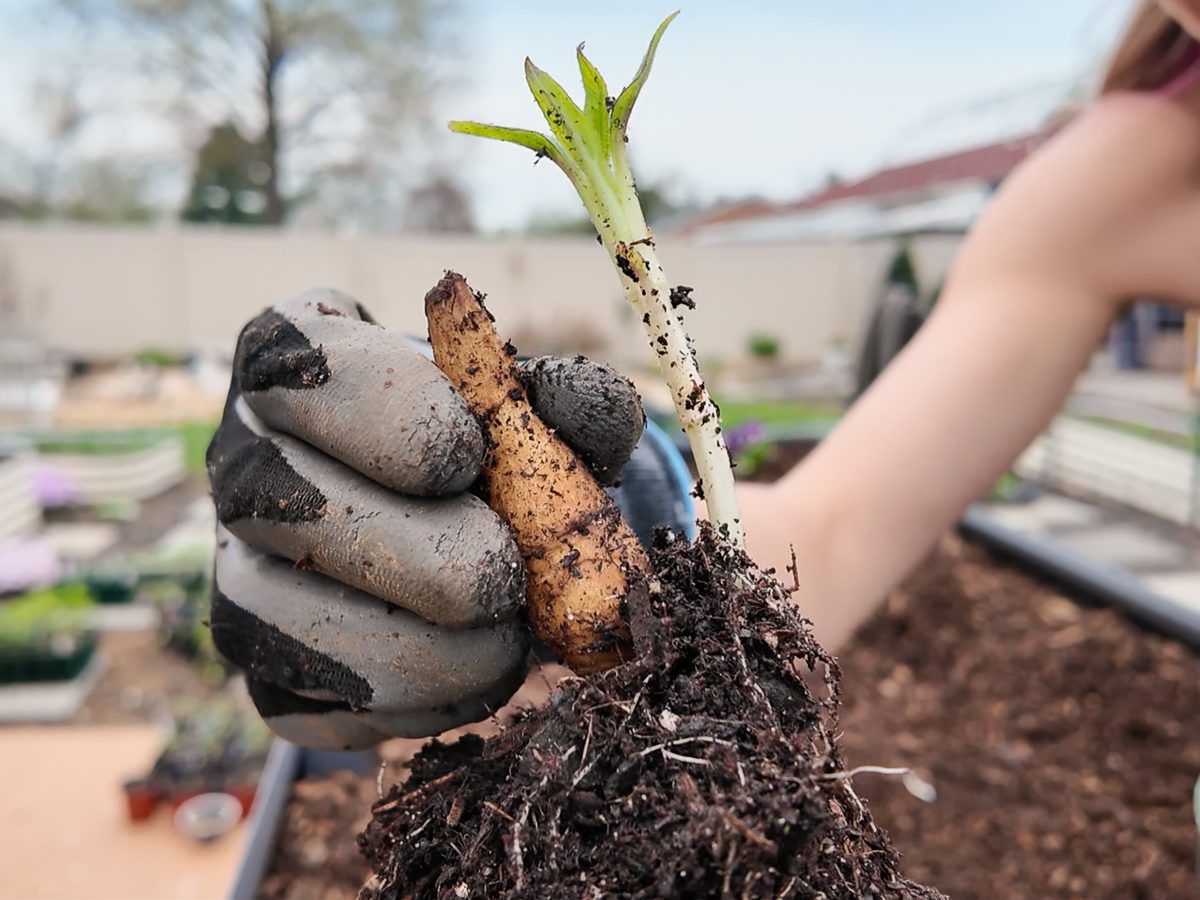
1. Sunchokes
Also referred to as Jerusalem artichokes. They are the edible tubers of a type of sunflower, actually. (Helianthus tuberosus). They aren’t actually related to artichokes or Jerusalem—they’re native to North America. They have a nutty, slightly sweet flavor. These are high up on the list of “survival garden” foods because of how hardy and prolific they are—spreading and returning year after year.
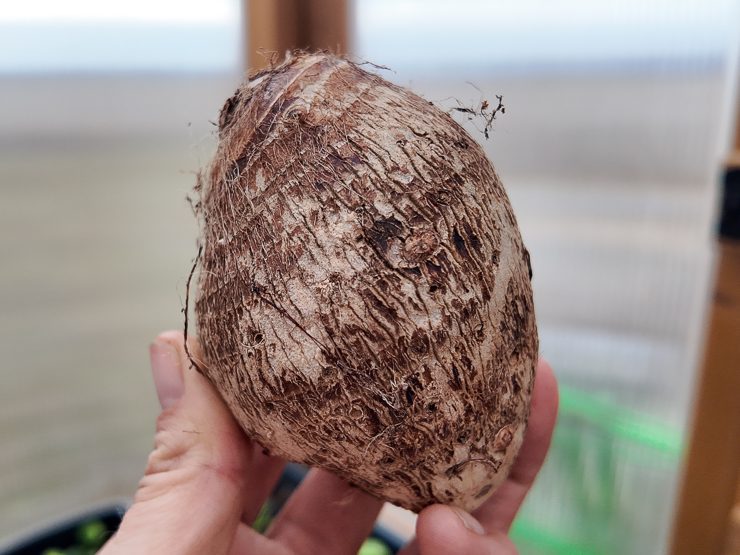
2. Taro
Taro tubers are part of the Colocasia esculenta plant, a tropical root crop grown for its starchy, edible corms. It is also grown as an ornamental plant! It is often referred to as a type of “elephant ear” plant, but not all elephant ear plants have edible tubers. The tubers must be cooked before eating, as raw taro contains compounds that can irritate the throat or be toxic.
3. Ginger
Not a whole lot of explanation needed here! Ginger is the underground rhizome of the Zingiber officinale plant, known for its spicy flavor. Ginger can be used in a ton of ways. I like dicing it up and freezing it for smoothies.

Sourcing the plants
For the sunchokes, I got some tubers from my cousin Jimmy. I don’t recommend buying these online. You’ll pay a lot more. Instead, get on Facebook marketplace (or any other similar neighborhood-style message board) and search for people selling tubers. There were a few people around me I almost bought from before I figured out my cousin had them.
Once you buy sunchokes once, you’ll never have to buy them again. You’ll have more than you know what to do with if you plant them in the ground, too!
For the taro bulbs, I tried two different types. I ordered some from an edible tuber shop on Etsy. Then I realized that was stupid and I could probably just buy them at my local H-Mart. They all rooted well with only one or two rotting. No discernible difference in sprouting or growth, and the H-Mart ones were MUCH cheaper!
And for the ginger, I got three pieces from H-Mart as well! This one I had less luck with. I tried to root three and two started rotting in the soil. But my goal was always to have one or two plants, so I call it a success getting one!

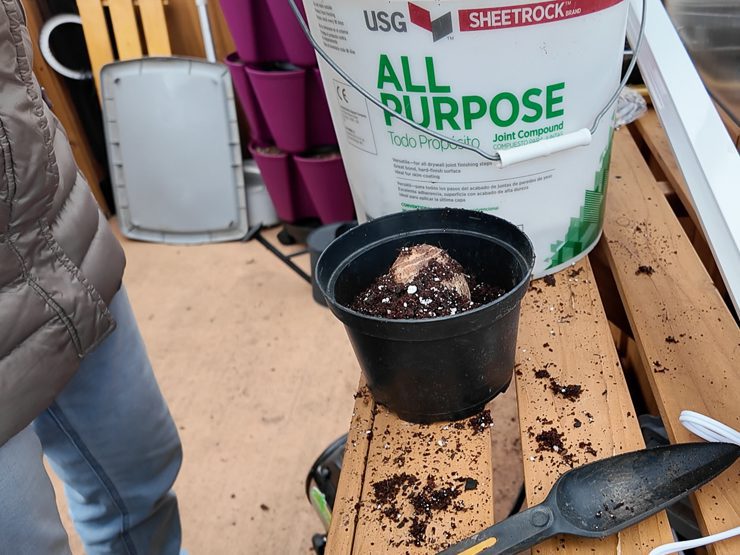
Step 1. Sprout tubers
So let’s get to planting our edible tuber garden. The first step is to sprout the tubers. If you live in a more tropical climate, you can probably just throw the tubers/rhizomes in the ground. However, I live in Maryland on the east coast of the United States, grow zone 7. We have a super hot summer, but we also have all four seasons.
So I decided to plant all of my starts early out in my greenhouse on a seedling mat. This is essential. You need heat to germinate. And if you don’t have a greenhouse, that’s fine. Grow lights will work well, too!
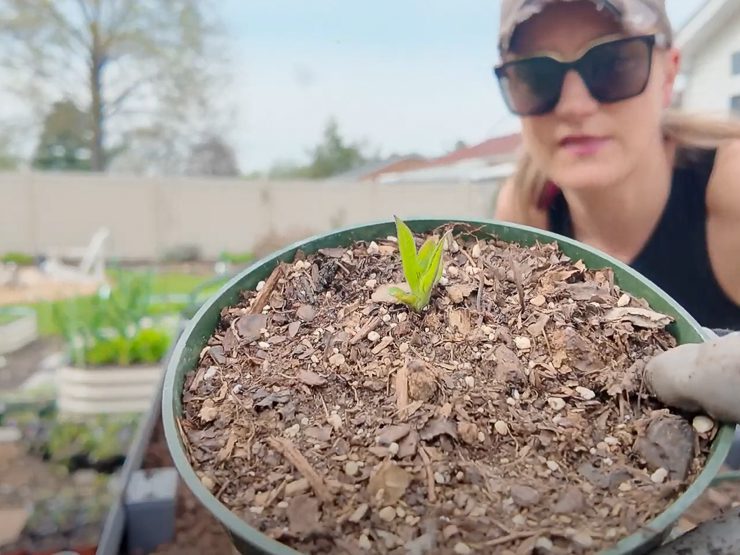
I started these in early March. I heated the greenhouse only to about 40 or so degrees Fahrenheit at night. During the day, even on days in the 30s, the greenhouse would get to about 60 or 70 degrees. The taro sprouted first, then the sunchokes. Just when I thought I wasn’t getting any ginger…it sprouted! Yay!
I just used a rich, well-draining soil to avoid rot as best as I could. Overall, I ended up having no sunchokes start rotting. One or two of the taro tubers rotted, and two of the three gingers rotted. Overall a good rate, I’d say.
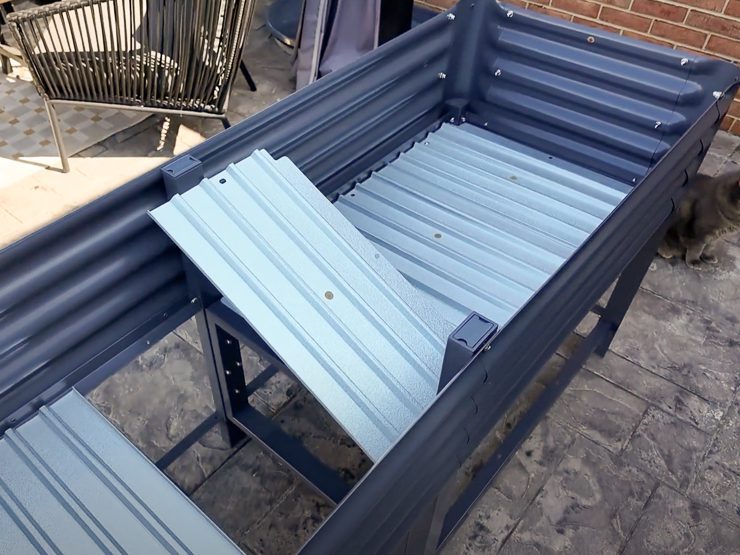
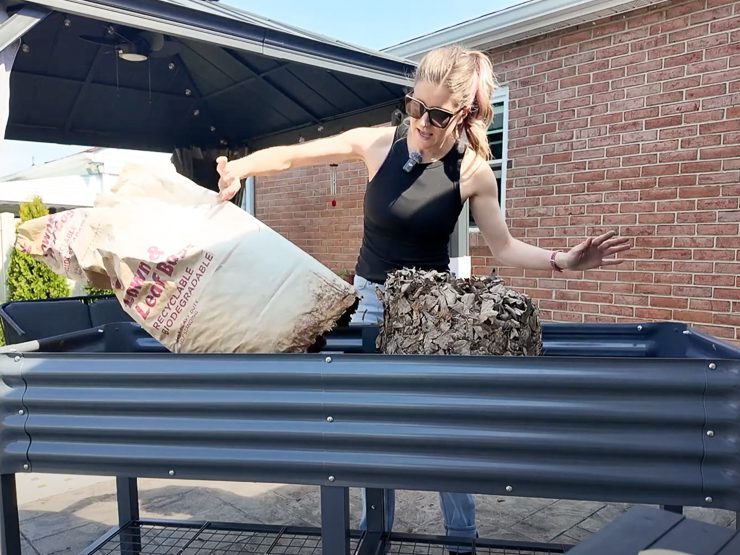
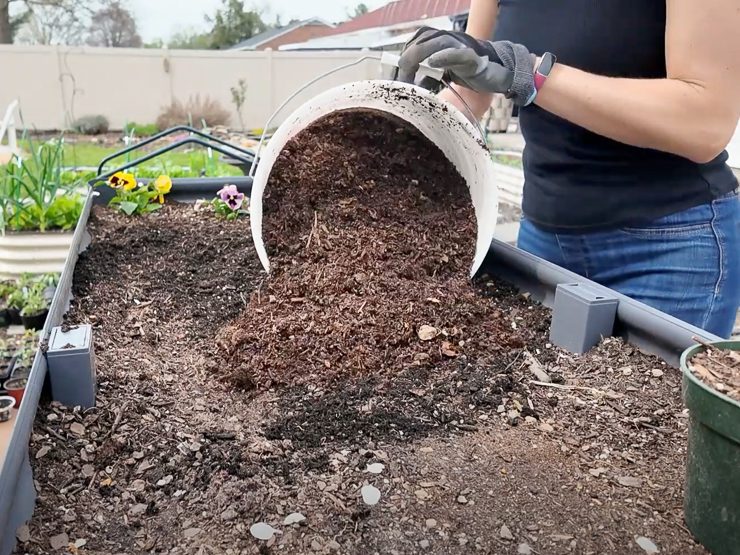
Step 2. Prepare planting area
I was planting in a new bed that I filled with several inches of leaves. Then I filled it with a mix of top soil and compost. I let that settle for a week or two, and then I topped off the beds with more soil and leaf compost.
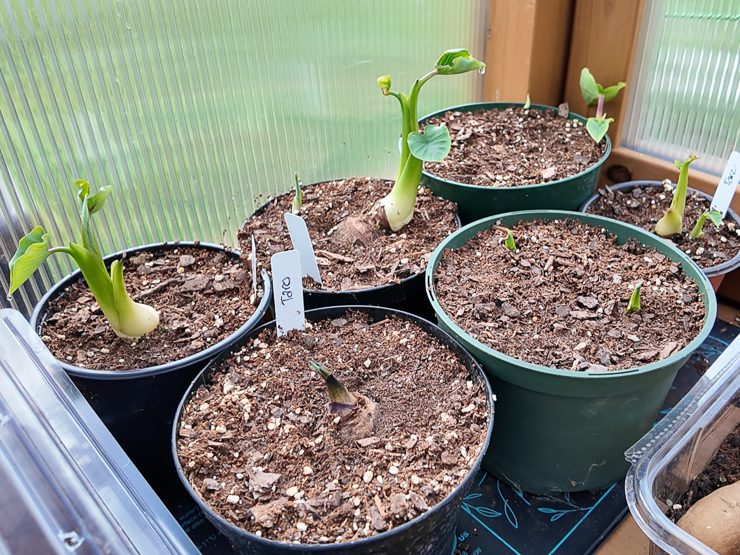
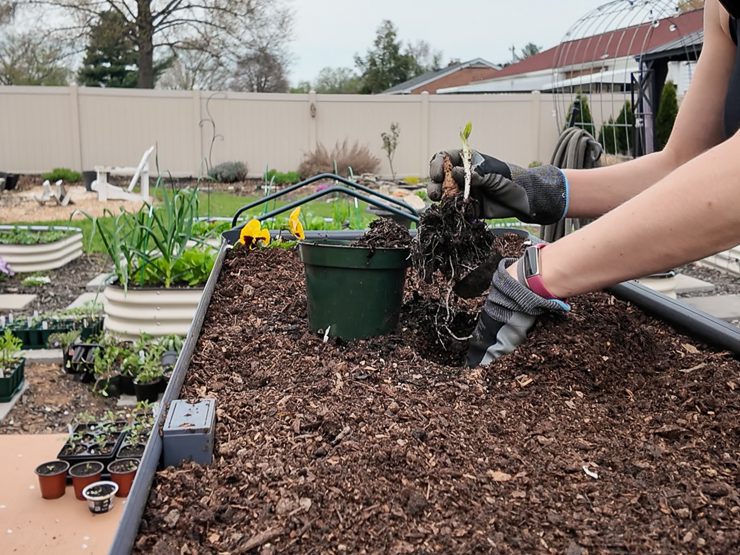
Step 3. Plant sprouted tubers
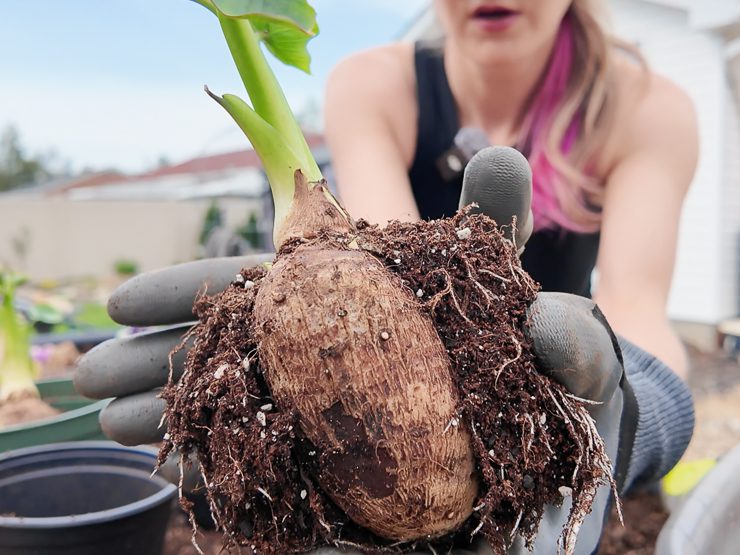
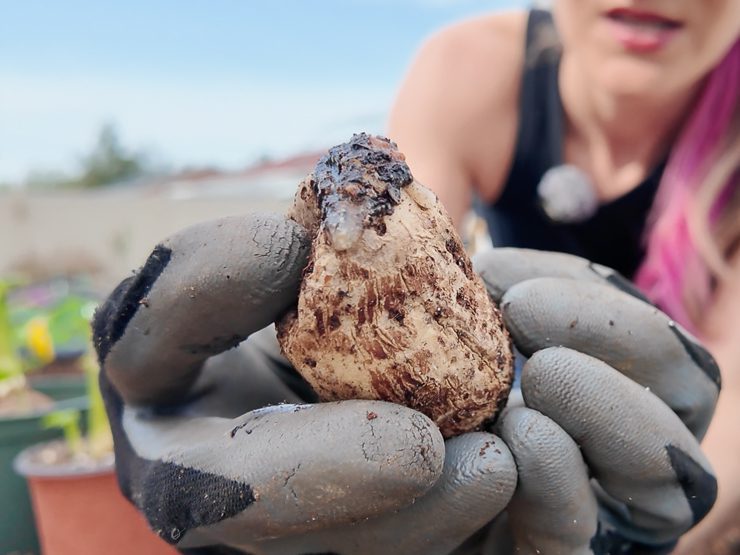
Once we were past any danger of frost, I planted all of my sprouted tubers in the bed. You can see below that the taro was a full on plant by this point. Already sending out shoots and multiplying! The third pic below shows one of the rotted taro tubers I unpotted.

The sunchokes were a bit smaller but not far behind. And the ginger was barely sprouting. I think I put it in a week or two after taking this footage because it was slow to root. So it isn’t in these pics.

Step 4. Keep soil moist
And once everything was planted, I added in a few flowers for some color and waiting. Once temperatures were consistently in the 70s during the day, everything really started to take off! I won’t dig the ginger and taro up until we’re nearing our first frost, and I’ll definitely do an update on that!
As for the sunchokes, it’s best to let them get hit by a frost before digging them up. I’ll likely cut down the foliage as we near the first frost and mark where the tubers are. Then I’ll dig them all up out of this bed (since it will definitely freeze over as an elevated bed) and put them in the basement like potatoes. More to come on the results of the edible tuber bed!