
How to Root Elderberry Cuttings
Today we’re talking about how to root elderberry cuttings. Elderberry shrubs, otherwise known by their genus name of Sambucus, are a gorgeous native perennial here in Maryland. But if you aren’t in Maryland, don’t worry! Elderberry has a pretty wide native range across North, Central, and South America.
American Elderberry is what you’ll commonly find growing in the wild, and the name for that one is Sambucus nigra. That’s the type I have growing in my front yard, and my plant actually started as a cutting from a neighbor! So let’s walk through how to grow this valuable shrub from cuttings.
Step 1: Take a good cutting
The first step of any successful propagation is to take a good cutting. There are two things to know about taking a good elderberry cutting, and they relate to the size of the cutting and the type of growth.
Cutting size
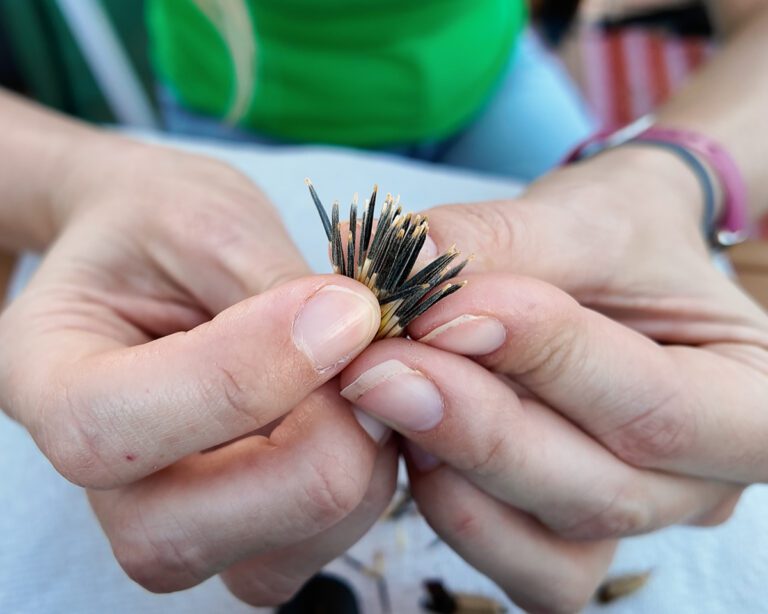
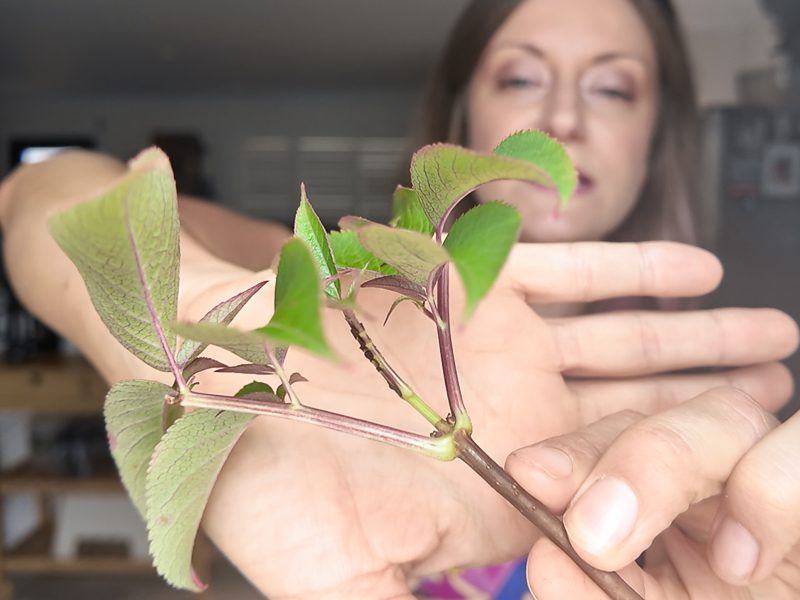
I like to stick with a cutting that has one to two sets of leaves and at least one exposed growth point. To expose a growth point, you can simply remove the bottom-most set of leaves from a cutting.
Elderberry grows opposing sets of pinnately compound leaves. “Pinnately compound” essentially just means that a leaf is made up of opposing sets of smaller leaflets. So, when I say a cutting that has two or more sets of leaves, I mean one like the cutting shown in the pic below. It has a couple sets of leaves that each have multiple leaflets.
Keep in mind that you don’t want your cuttings to be too large, because if they are, the plant will have a hard time keeping the cutting’s foliage alive while it is also trying to divert its energy into developing new roots.
If your leaves are mature and have larger leaflets, it might be a good idea to cut each leaf in half to decrease the number of leaflets the cutting has to maintain while rooting.


Type of growth
Elderberry shrubs can also have woody and semi-woody growth. Woodier growth will be the older, and it will look more like a small tree branch or trunk. Semi-woody growth can also be referred to as “softwood” growth, and it’s just the newer growth on the plant.
If you’re propagating an elderberry cutting in the spring or summer when the plant is actively growing, choose a cutting from an area with semi-woody or softwood growth. If you’re propagating in the fall or winter when the plant is dormant or going dormant, choose a woodier cutting.
Step 2: Put in water or soil
You can root elderberry cuttings in water or soil, and the preferred method depends on the type of cutting. And, sometimes, it can depend on how lazy you’re feeling 🙂
Hardwood cuttings propagated in the fall or winter will do best planted directly in well-draining soil. You can water sparingly until it begins to warm up and you see signs of growth.
Softwood cuttings, however, are a bit more flexible. I like to root them in water first. Often I find myself pruning plants and not having the time to plant the cuttings, so I pop them in water.
This can also be a fun way to watch some roots sprout and decrease transplant shock. I have planted elderberry cuttings directly in soil, and while they have been successful and have rebounded nicely, they always suffer a bit of transplant shock.
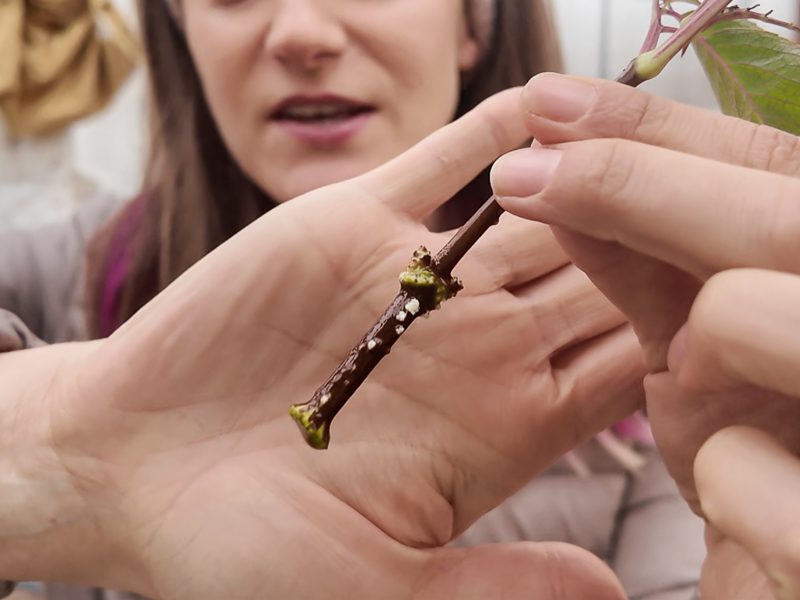
However, the cuttings that I keep in water for a few weeks first seem to transition better to soil. Likely because they already have a bit of a jumpstart to help them along! The pic below is a cutting I’d had in water for a few weeks.
Step 3: Keep soil moist
If your cutting is already in soil and you’ve already been keeping it moist, you’re good to go! As soon as you see signs of new growth, you know your experiment has been a success.
If you’re transferring a cutting to soil that has been rooting in water, make sure to pot it up in fresh well-draining soil. Give it a deep drink and make sure to keep the soil evenly moist to encourage root growth. A warm, bright spot helps, too. And that’s it! Enjoy your elderberry babies—or pass them along to new homes 🙂